To pour ready-mix concrete for flawless slabs and foundations, start with proper site preparation. Clear away any debris and ensure adequate drainage. Select the right concrete mix based on your project needs, paying attention to the water-cement ratio for optimal strength. Utilise essential tools such as mixers and screeds for uniform results. Pour in layers, maintaining a steady flow to avoid cold joints. Keep an eye on moisture levels during the curing process to boost durability. Consider additional tips and techniques to take your project to the next level.
Key Takeaways
- Prepare the site by clearing away debris and vegetation, and ensure proper drainage to avoid future problems with the concrete slab. For example, consider creating a slight slope away from the foundation.
- Choose the right concrete mix and maintain an appropriate water-cement ratio for maximum strength and durability. A good rule of thumb is to aim for a ratio of around 0.5.
- Pour the concrete in layers of 30 cm to 90 cm, ensuring a continuous flow. This helps to prevent cold joints and keeps the structure sound.
- Use effective curing methods, such as wet burlap or plastic sheeting, to keep the concrete moist and enhance its strength. This step is crucial, especially in warm or windy conditions.
- Regularly check the slab for any signs of distress and keep drainage systems clear to prevent water pooling around the foundations. For instance, ensure gutters and downspouts are functioning correctly.
Site Preparation for Concrete Pouring

Site preparation is crucial for a successful concrete pour. Start with a thorough inspection of the area to remove any debris, rocks, and organic materials—this ensures a clean foundation.
Clear away any vegetation and roots that could disrupt the slab or cause decay. It's also important to eliminate any standing water, as this could lead to drainage issues in the future. Proper preparation of the site is essential to prevent future settlement and cracking in the concrete.
Next, inspect the soil to understand its composition and make any necessary adjustments. Excavate to the proper depth and lay down a gravel base of 75-100mm for effective drainage. Spread gravel aggregate within the formwork to prevent erosion and support the concrete slab.
Use mechanical compactors to stabilise the base and consider additional drainage solutions if needed. These steps help create a solid foundation for your concrete, reducing the risk of problems during and after the pour.
Selecting the Right Concrete Mix

When choosing the right concrete mix, it's essential to understand the different concrete grades and their specific uses. Working closely with suppliers ensures you receive the right mix that meets your project's strength and durability needs. For example, if you're building a patio, a standard mix like C25/30 might suffice, while a structural project may require a higher grade like C30/37. Understanding the key factors that influence the selection of concrete mixes is crucial for achieving optimal results. Additionally, considering the water-cement ratio is vital, as it significantly impacts the concrete's strength and durability.
Understanding Concrete Grades
Choosing the right concrete mix is crucial for your construction project, as it directly affects durability and structural integrity. Concrete grades are classified by their compressive strength, measured in MPa, to ensure they meet specific needs. Ordinary grades like M10, M15, and M20 are ideal for non-structural uses, whereas standard grades (M25 to M45) offer a good balance of cost and strength, suitable for internal slabs and lightweight foundations. For more demanding applications, high-strength grades (M40 and above) deliver enhanced durability and resistance to harsh conditions. When selecting a grade, assess your project requirements and conduct compressive testing to confirm the concrete's strength meets your needs, ensuring a solid foundation for your build. Additionally, C25 is the strongest standard mix, making it suitable for large mass fills and footings. Understanding concrete grades helps in choosing the appropriate mix based on the specific structural demands of your project.
Collaborating With Suppliers
Understanding concrete grades is essential for effective collaboration with suppliers to select the right mix for your project.
Begin by evaluating potential suppliers based on their experience and reputation. Look for those who offer high-quality materials and have the necessary certifications. During contract negotiations, ensure they can meet your project's load-bearing requirements and environmental conditions, and consider any special needs, such as custom mixes.
It's also important to assess their logistical capabilities to ensure timely deliveries and sufficient production capacity.
Don't forget to seek technical support; suppliers should be able to provide advice on optimal mix designs.
Essential Tools and Equipment
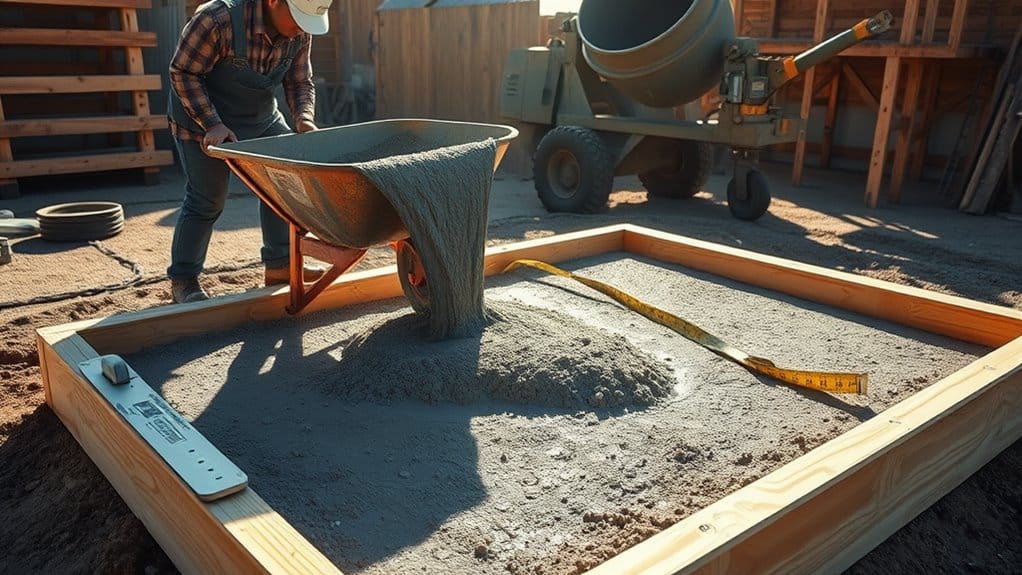
Pouring ready-mix concrete requires specific tools and equipment to ensure a successful job. Start with a concrete mixer, whether it's truck-mounted or portable, for thorough mixing.
You'll also need wheelbarrows for transporting and mixing on-site. Don't forget your rubber boots, gloves, and safety glasses for protection.
For pre-pour preparation, compactors and levels are essential to create a stable, even base. Use shovels and digging bars to fill gaps and break up hard ground.
When finishing, invest in screeds, bull floats, and magnesium floats to achieve smooth surfaces.
Lastly, prioritise tool maintenance and select the right equipment to improve efficiency and ensure safety throughout the process. Having the right gear is crucial for achieving durable, high-quality concrete slabs.
Techniques for Pouring Concrete

When preparing to pour ready-mix concrete, using effective techniques is crucial for achieving a strong, durable surface. Proper pouring methods can significantly reduce segregation and ensure uniformity.
- Pour in layers ranging from 30 cm to 90 cm thick, allowing for settling between each layer.
- Use a straight down placement to minimise segregation and prevent honeycombing.
- Maintain a continuous flow to avoid cold joints and ensure structural integrity.
Make sure your site is well-prepared—clear away debris and set up secure formwork.
Also, keep an eye on the weather, as extreme temperatures can adversely affect the curing process.
Achieving a Smooth Finish

Achieving a smooth finish on your concrete surface is a crucial step that follows effective pouring techniques. To improve your results, prioritise quality materials and precise finishing methods. Here's a quick overview:
| Element | Importance | Tools/Methods |
|---|---|---|
| Quality Concrete Mix | Ensures workability and durability | Use high-quality aggregates and additives |
| Base Preparation | Minimises settling and enhances finish | Employ compaction tools |
| Finishing Techniques | Delivers surface smoothness | Use manual trowels or power trowels |
Consider using finishing techniques alongside enhancements like polishing or sealing to protect and beautify your concrete. Timing is key; begin finishing when the concrete is firm yet workable for optimal results.
Curing Methods for Strong Concrete

After pouring your ready-mix concrete, effective curing methods are crucial for achieving strong, durable results.
It's important to maintain moisture control to ensure proper hydration, which directly affects strength development.
Familiarising yourself with various curing techniques will help you select the best method for your project's specific conditions.
For example, using wet burlap or plastic sheeting can effectively retain moisture, especially in warm weather.
Curing Techniques Overview
Curing concrete properly is vital for achieving maximum strength and durability, as it ensures adequate hydration during the crucial early setting stages.
Effective curing techniques enhance moisture retention, allowing the concrete to reach its full potential. Here are some common methods:
- Water Curing: Keep the surface continuously wet to prevent moisture loss.
- Moisture-Retaining Covers: Use plastic sheets or damp burlap to help seal in moisture.
- Membrane Curing: Apply compounds that create a protective film on the surface.
Each method has its advantages, so select one that best fits your project's conditions.
Importance of Moisture Control
Moisture control is crucial in the concrete curing process, as it significantly affects the material's strength and durability. Proper moisture retention and evaporation prevention ensure your concrete achieves optimal hydration. Here's a concise comparison of key curing methods:
| Method | Description | Advantages |
|---|---|---|
| Water Curing | Continuous moisture supply | Straightforward and effective |
| Plastic Sheeting | Covers concrete to prevent moisture loss | Cost-effective |
| Wet Burlap Application | Keeps surface moist for longer periods | Suitable for large areas |
| Curing Membranes | Seals moisture directly onto concrete | Minimises surface defects |
| Steam Curing | Utilises steam to speed up hydration | Perfect for cooler weather |
Select the method that best enhances the strength and longevity of your concrete projects.
Quality Control and Testing Procedures

Quality control and testing procedures are vital for ensuring the integrity and performance of ready-mix concrete during production and application.
By implementing robust quality assurance measures, you can ensure compliance with testing standards and improve durability. Regular inspections and tests help identify potential problems before they become serious.
- Precise batching techniques reduce human error.
- Slump tests evaluate workability, ensuring your mix is optimal.
- Compressive strength tests confirm that the concrete meets required specifications.
Common Challenges and Solutions
When pouring ready-mix concrete, you may encounter challenges such as weather delays, uneven surfaces, and air pockets.
To manage these issues effectively, plan your work around temperature changes, ensure your forms are level, and use methods to remove trapped air.
Weather-Related Delays
Weather-related delays can significantly affect the pouring and curing of ready-mix concrete, so it's important to plan ahead.
Seasonal factors, like cold or hot weather, can alter the hydration process and setting times.
Here are some effective strategies to minimise these weather impacts:
- Use insulation blankets and steam heating systems in cold conditions.
- Add retarders and use cool water to cope with high temperatures.
- Set up tents or tarps to shield against rain.
Uneven Surface Issues
Uneven surfaces in ready-mix concrete can create significant problems, impacting both appearance and structural strength. Common causes of unevenness include inadequate site preparation, incorrect mix ratios, poor formwork, and insufficient compaction.
To prevent these issues, ensure thorough clearing and compacting of the sub-base before starting. Use the correct concrete mix with precise component ratios to ensure consistency.
When pouring the concrete, work in sections to maintain an even surface, and use mechanical compactors for proper compaction.
Finally, apply finishing techniques with tools like screeds to achieve a smooth finish. By addressing these factors, you can significantly improve the quality and durability of your concrete slabs.
Air Pocket Problems
Air pockets in ready-mix concrete can create significant issues during pouring, impacting both the material's strength and performance.
It's essential to grasp the difference between air entrapment and air entrainment; while entrained air can enhance durability, entrapped air can lead to structural weaknesses.
Common problems include:
- Inadequate compaction of the subgrade.
- Temperature fluctuations affecting air content.
- Poor mixing practices that cause excessive agitation.
To reduce air pocket issues, adjust admixtures to effectively manage air content.
Keep temperatures stable during transport to maintain air levels.
Ensure mixing doesn't exceed 15 minutes to avoid air loss.
Finally, ensure the subgrade is well-compacted to minimise the risk of uneven settling.
Maintenance of Concrete Slabs and Foundations

Maintaining concrete slabs and foundations is crucial for their longevity and structural soundness. Small issues can quickly develop into significant problems if neglected.
Conduct regular inspections to spot early signs of distress and keep an eye on moisture levels to prevent settling. Ensure that your gutter and drainage systems are well-maintained to avoid water pooling, and ensure the ground is graded away from the foundation.
Applying a high-quality sealant to the slab helps protect against moisture and wear.
Be mindful of landscaping; plant trees with care and consider installing root barriers to prevent damage from tree roots.
Adjust your watering and drainage strategies seasonally to further bolster your foundation's stability, ensuring it remains robust and durable for years to come.
Environmental Considerations
Before pouring ready-mix concrete, it's important to consider the environmental impact of your actions.
By choosing sustainable materials and following environmental regulations, you can significantly reduce your project's ecological footprint.
Here are some key points to keep in mind:
- Use recycled aggregates to lessen the reliance on new materials.
- Ensure proper site preparation to minimise environmental disruption.
- Monitor air quality during and after the pour to meet regulatory standards.
Restoration Techniques for Damaged Concrete

When concrete becomes damaged, prompt restoration can prevent further deterioration and extend the structure's lifespan.
For effective crack repair, consider using crack injection with epoxy or polyurethane; this method seals cracks and reinforces the concrete's integrity.
Surface restoration can be achieved through resurfacing, where a new layer of concrete or overlay material is applied to improve both appearance and functionality.
For small areas of damage, patching is a simple and effective way to replace compromised concrete.
More extensive repairs may require carbon fibre reinforcement to stabilise weakened structures.
Additionally, concrete raising can rectify sunken slabs, restoring them to their original position and ensuring long-term durability.
Employing these techniques will help maintain the strength and visual appeal of your concrete surfaces.
Frequently Asked Questions
What Is the Best Time of Year to Pour Concrete?
The best time to pour concrete in the UK is during the mild spring or autumn months, ideally when temperatures range between 10°C and 21°C. This ensures proper curing and helps prevent issues caused by extreme weather. For instance, pouring in chilly winter or hot summer conditions can lead to cracks or poor setting. Aim for those temperate days to achieve the best results.
How Long Should I Wait Before Walking on Freshly Poured Concrete?
You should wait at least 24 hours before walking on freshly poured concrete. This ensures proper curing, helps maintain the surface finish, and prevents damage during the early, delicate stages of the curing process. For example, stepping on it too soon could leave marks or create uneven areas.
Can I Pour Concrete in Freezing Temperatures?
You can pour concrete in freezing temperatures, but it's essential to take cold weather precautions. Use insulation, heated materials, and suitable curing methods to ensure the mix stays at the right temperature and achieves its full strength. For example, using blankets or insulating mats can help keep the concrete warm.
How Do I Know if My Concrete Mix Is Too Dry?
If you're seeing signs that your concrete mix is too dry, like trouble spreading or more cracks than usual, it's crucial to check the moisture levels. You can do this with simple touch tests or slump tests to ensure your mix has the right amount of water.
What Should I Do if It Rains After Pouring Concrete?
If it rains after you've poured concrete, keep a close eye on what's happening. Quickly remove any surface water and check for any signs of damage. Make sure the concrete has set enough to endure the rain. For instance, if you notice pooling water on the surface, use a broom to sweep it away. This helps prevent any weak spots from forming in the concrete.
Conclusion
Just as a robust tree needs a solid base to flourish, your concrete slabs and foundations require careful preparation and attention to detail. Selecting the right mix, using the proper tools, and mastering pouring techniques are essential for creating a durable surface that lasts. Regular maintenance is key, so address any issues quickly. With these strategies, you're well-equipped to lay a strong foundation for any structure you have in mind.

Learn about the diverse types of concrete used in construction and discover which mix can transform your next project.

For a long-lasting driveway that laughs in the face of the UK's unpredictable weather, the C20 concrete mix is your Read more

In the UK, you've got a a lot of lightweight concrete types to choose from, each with its unique perks. Read more