To use a concrete bull float effectively, begin immediately after screeding while the surface is still wet. Keep the float at an angle of 10 to 15 degrees and use long, sweeping strokes, overlapping slightly to avoid lap marks. Apply light pressure to prevent dragging, aiming for a smooth finish with two to three passes. Choose the right float material for your project, and finish with edging and trowelling techniques for optimal results. With these tips, you can enhance your concrete work significantly.
Key Takeaways
- Start bull floating as soon as you’ve screeded the concrete while it’s still wet for the best results.
- Keep the float at an angle of 10 to 15 degrees and use long, sweeping motions for an even finish.
- Overlap each sweep slightly to minimise lap marks and achieve a smooth surface.
- Limit your passes to 2-3 to avoid excessive bleed water and keep the surface porous.
- After the initial smoothing with the bull float, switch to magnesium floats for a finer texture.
Understanding the Purpose of a Bull Float

Understanding the purpose of a bull float is crucial for achieving a quality concrete finish. The bull float smooths and levels wet concrete immediately after screeding, addressing imperfections like high and low spots. This tool pushes the aggregate down, allowing moisture to rise, which is vital for proper curing. The use of a concrete bull float is particularly important as it helps compact the surface and brings the “cream” to the top, ensuring an even finish. Additionally, using a bull float effectively can enhance moisture retention during the curing process, which is essential for optimal concrete strength.
The benefits of using a bull float include creating a flat, defect-free surface that fills small holes, setting the stage for further finishing techniques. With its long handle, you can float large areas without stepping on the wet concrete, thus preserving the integrity of the slab. Different materials, such as magnesium or wood, can be used for floating, each affecting the final surface texture.
Preparing for Bull Floating

Once you understand the purpose of a bull float, it’s time to prepare for the floating process. Start by clearing the work area of any debris and ensuring the formwork is secure.
Check the surface of the concrete to make sure it’s firm enough to support the weight of the bull float without sinking. The surface should be moist but workable, and the initial screeding should have levelled the concrete. Timing is critical to ensure the concrete is still in its plastic state for effective floating. Maintaining proper water-cement ratio is essential for achieving the desired consistency and workability of the concrete mixture.
Keep an eye out for any bleed water and perform a finger test to determine if the surface is ready.
Finally, choose the right bull float material, attach the handle securely, and wear appropriate safety gear. This will help you work effectively while minimising risks.
Timing: When to Use the Bull Float

Timing is crucial when using a bull float, as it affects the quality of your concrete surface.
Begin floating right after screeding, while the concrete is still wet and plastic, before any bleed water appears. If you float too early, the aggregate may not settle properly, jeopardising the finish. On the other hand, waiting too long can lead to a rough surface, making it harder to smooth out later. Additionally, using the bull float effectively can help achieve a sleek, level surface that enhances the overall appearance of your project. Proper curing techniques, such as maintaining moisture, are also essential for achieving a durable finish.
Keep an eye on environmental factors; hot or windy weather will require quicker action to prevent the concrete from setting too soon, while cooler conditions may allow for a slight delay.
Always ensure the surface feels wet and pliable, and avoid floating once the sheen fades to achieve the best results. Proper timing is key to ensuring a flat, even surface for the next finishing steps.
Techniques for Effective Bull Floating

For effective bull floating, it’s crucial to focus on timing and preparation, ensuring you start before any bleed water appears.
It’s important to master the right floating technique to level and smooth the concrete surface without overworking it.
Having the appropriate tools on hand post-bull floating will also help you achieve a consistent finish across the entire slab.
Proper Timing and Preparation
As you prepare to bull float, it’s crucial to ensure the concrete is at the correct setting stage for optimal results. Proper timing significantly improves the benefits of bull floating, leading to a more durable surface.
Follow these three essential steps:
- Start Immediately After Screeding: Begin bull floating right after levelling the concrete to ensure it’s firm enough to support the float without sinking.
- Check for Bleed Water: Wait for any bleed water to evaporate before floating; this prevents weakening the surface.
- Assess the Concrete Firmness: Ensure the concrete is soft enough to shape yet firm enough to support the float, usually just before bleed water appears.
Correct Floating Technique
When bull floating, using the right technique is crucial for a smooth, even surface. Aim for a float angle of 10 to 15 degrees, gliding over high spots without digging in. Push the float forward and pull it back with long, sweeping strokes, overlapping slightly to reduce lap marks. Here’s a summary of key bull float techniques:
| Technique | Description |
|---|---|
| Float Angle | Maintain 10-15 degrees for effective gliding |
| Stroke Direction | Reverse direction after each pass to minimise irregularities |
| Pressure Control | Apply light, steady pressure to prevent dragging |
Avoid excessive floating to maintain surface porosity and ensure proper curing.
Post-Bull Float Tools
Once you’ve finished bull floating, using the right tools and techniques is crucial for achieving a high-quality finish on your concrete slab.
After a post-float inspection, check that the surface is firm enough before proceeding with finishing techniques.
Follow these steps:
- Edging and Jointing: Use an edger to round off the slab edges and jointing tools to minimise random cracking. Ensure you apply consistent pressure.
- Hand Floating: Use magnesium or wooden hand floats to smooth out minor irregularities. Long floats are helpful for reaching difficult edges.
- Final Trowelling: Employ steel trowels for a dense, durable surface. Be mindful of timing your trowelling to prevent tearing while enhancing durability.
These steps will help you achieve a smooth, long-lasting finish on your concrete slab.
Selecting the Right Bull Float Materials and Sizes

When choosing the right materials and sizes for a bull float, it’s important to consider the specific needs of your project.
Magnesium floats are lightweight and durable, making them easy to use, which is perfect for professionals. Aluminium floats are also light but not as robust, while laminated wood offers sturdiness but is heavier. Steel floats are very durable but can be harder to handle.
In terms of size, bull floats generally range from 6 to 8 inches in width and 24 to 192 inches in length.
Smaller floats (24-48 inches) are great for tight spaces, while medium sizes (48-60 inches) work well for standard slabs. For larger areas, longer floats can help improve efficiency.
Following up With Additional Finishing Tools

After bull floating, use magnesium floats to achieve a smoother finish.
Then, round off the slab edges with edgers to minimise the risk of chipping.
Finally, use a groover to cut control joints, which help manage cracking as the concrete sets.
Magnesium Float Refinement
As you work on your concrete finishing, using a magnesium float is just the first step towards achieving a smooth, well-prepared surface.
The magnesium float has several advantages that improve your surface preparation. Here are three key benefits:
- Consolidates the surface: It helps to move fine cement cream into voids, smoothing out rough patches without sealing the surface too much.
- Enhances uniformity: It reduces the porous textures left by bull floating, resulting in a better overall appearance.
- Prepares for final finishing: By removing tool marks and blending edges, it lays the groundwork for steel trowelling.
For the best results, hold the float at a 45° angle, apply consistent pressure, and use circular motions to ensure even smoothing across larger areas.
Edging and Control Joints
To achieve a polished concrete surface, follow your bull floating with effective edging and control joint techniques. Start by using proper edging to create clean, rounded edges that help prevent chipping. Ensure the concrete is firm yet soft enough for cutting. Next, focus on placing control joints, spaced every 2 to 3 metres, to reduce cracking. Cut the joints to a depth of one-quarter the slab thickness for best results.
| Task | Timing | Tool |
|---|---|---|
| Edging | Soon after bull floating | Edger |
| Control Joint Cut | After edging, before hardening | Grooving tool/Saw |
| Final Finishing | Once the slab can bear weight | Steel trowel |
Best Practices for Smoothing Large Surfaces

To achieve a smooth concrete surface, it’s important to bull float soon after screeding. This helps prevent the formation of uneven ridges and voids. Here are some best practices:
- Timing: Start bull floating before any bleed water appears. You can check if the surface is ready by gently pressing your finger into it.
- Technique: Use long, sweeping motions, keeping the leading edge of the float tilted slightly upwards to avoid disturbing the concrete.
- Passes: Aim for just 2-3 passes to avoid excessive bleed water that can weaken the finish.
After bull floating, move on to magnesium floats and steel trowels for a finer texture.
Tips for Maintaining Your Bull Float and Tools
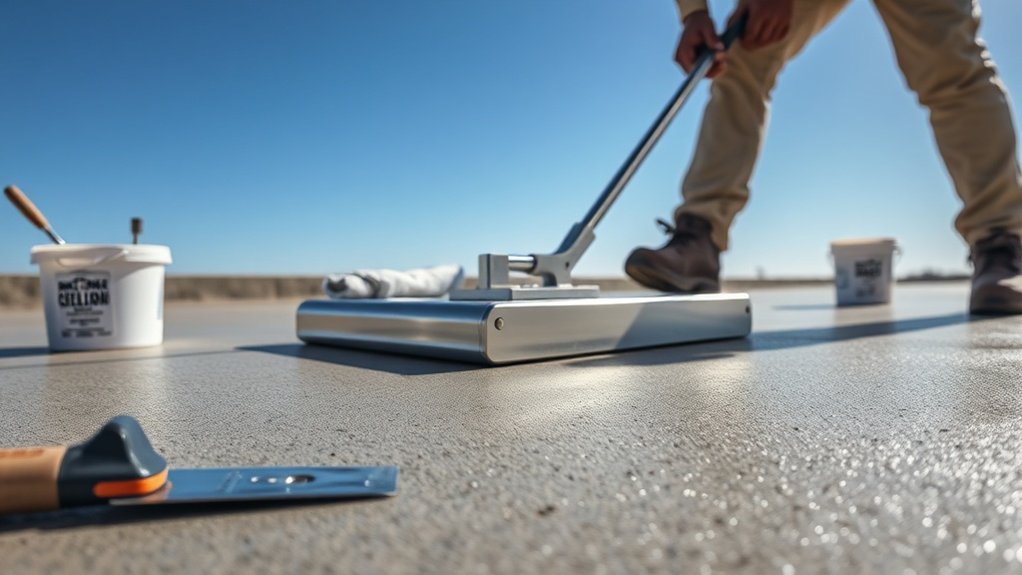
Maintaining your bull float and tools is crucial for optimal performance in concrete work. Neglect can lead to reduced efficiency and a shorter lifespan for your equipment.
Establish a regular maintenance routine: rinse off concrete residue and use mild cleaners after each use. Store your bull float correctly by hanging it up to avoid damaging the blade and keeping it dry to prevent rust.
Check the blade for nicks and sand lightly if necessary. Lubricate adjustable brackets to ensure smooth movement, but don’t overdo it.
Wooden handles require special attention; dry them completely and apply preservatives if needed. By following these tips, you’ll enhance the longevity of your tools and keep them in top condition.
Frequently Asked Questions
Can I Use a Bull Float on Dry Concrete?
You can’t use a bull float on dry concrete. It won’t work effectively and can cause surface damage and poor curing. Always use the bull float while the concrete is still workable to ensure proper consolidation and a smooth finish.
How Do I Clean a Bull Float After Use?
After using your bull float, rinse it promptly with water to eliminate any residue. Use a soft brush to scrub off any concrete that may have stuck. Regular maintenance will help extend its lifespan and ensure better performance.
What Safety Gear Should I Wear While Bull Floating?
When bull floating, it’s important to wear safety goggles to protect your eyes from concrete splashes, and gloves to safeguard your hands from the harsh, alkaline nature of the concrete. This gear will help ensure your safety during the task.
Can I Rent a Bull Float Instead of Buying One?
Yes, you can rent a bull float for concrete finishing. Renting helps save money, avoids depreciation, and eliminates the need for storage. This is perfect for short-term projects where you don’t want the commitment of buying expensive equipment that you may not use regularly. For instance, if you’re only working on a few driveways or patios, renting is a smart choice.
What Common Mistakes Should I Avoid When Bull Floating?
When bull floating, steer clear of overworking the surface, floating too early or too late, and neglecting your equipment. For instance, if you float too soon, you risk pulling up aggregates, while floating too late can lead to a rough finish. Regular maintenance of your tools is also essential. By mastering these techniques, you’ll achieve smooth, even concrete surfaces and avoid problems like cracking.
Conclusion
In concrete finishing, a bull float is essential for achieving a smooth surface. Knowing when and how to use it will greatly improve your results. For instance, use it after pouring the concrete but before it sets to level out any imperfections. Additionally, ensuring your tools are well-maintained will extend their lifespan and enhance your work quality. With these tips, you’ll be well on your way to a perfect finish!
Need concrete mixed & delivered?
Barrow Mix delivers volumetric ready-mix concrete across Greater Manchester & Cheshire — mixed fresh on site, barrowed or pumped to the pour, from as little as ½m³. You only pay for what you use.

Looking to elevate your interiors with polished concrete finishes? Discover the styles, benefits, and secrets that can transform your space Read more

Step into the world of textured concrete finishes for slip-resistant surfaces, and discover essential techniques that ensure safety and durability.
Moisture prevention is crucial for concrete surfaces; discover how sealed finishes can safeguard your structures and enhance durability in surprising Read more